Posted on Leave a comment

How to Make Beer

Step 1: The Mash

BRWIT Kit Method (Brew-in-a-bag)

1. Heat 7L of water to around 70 degrees Celsius. Don’t fill the pan to the brim as you will need some room to add your ingredients.

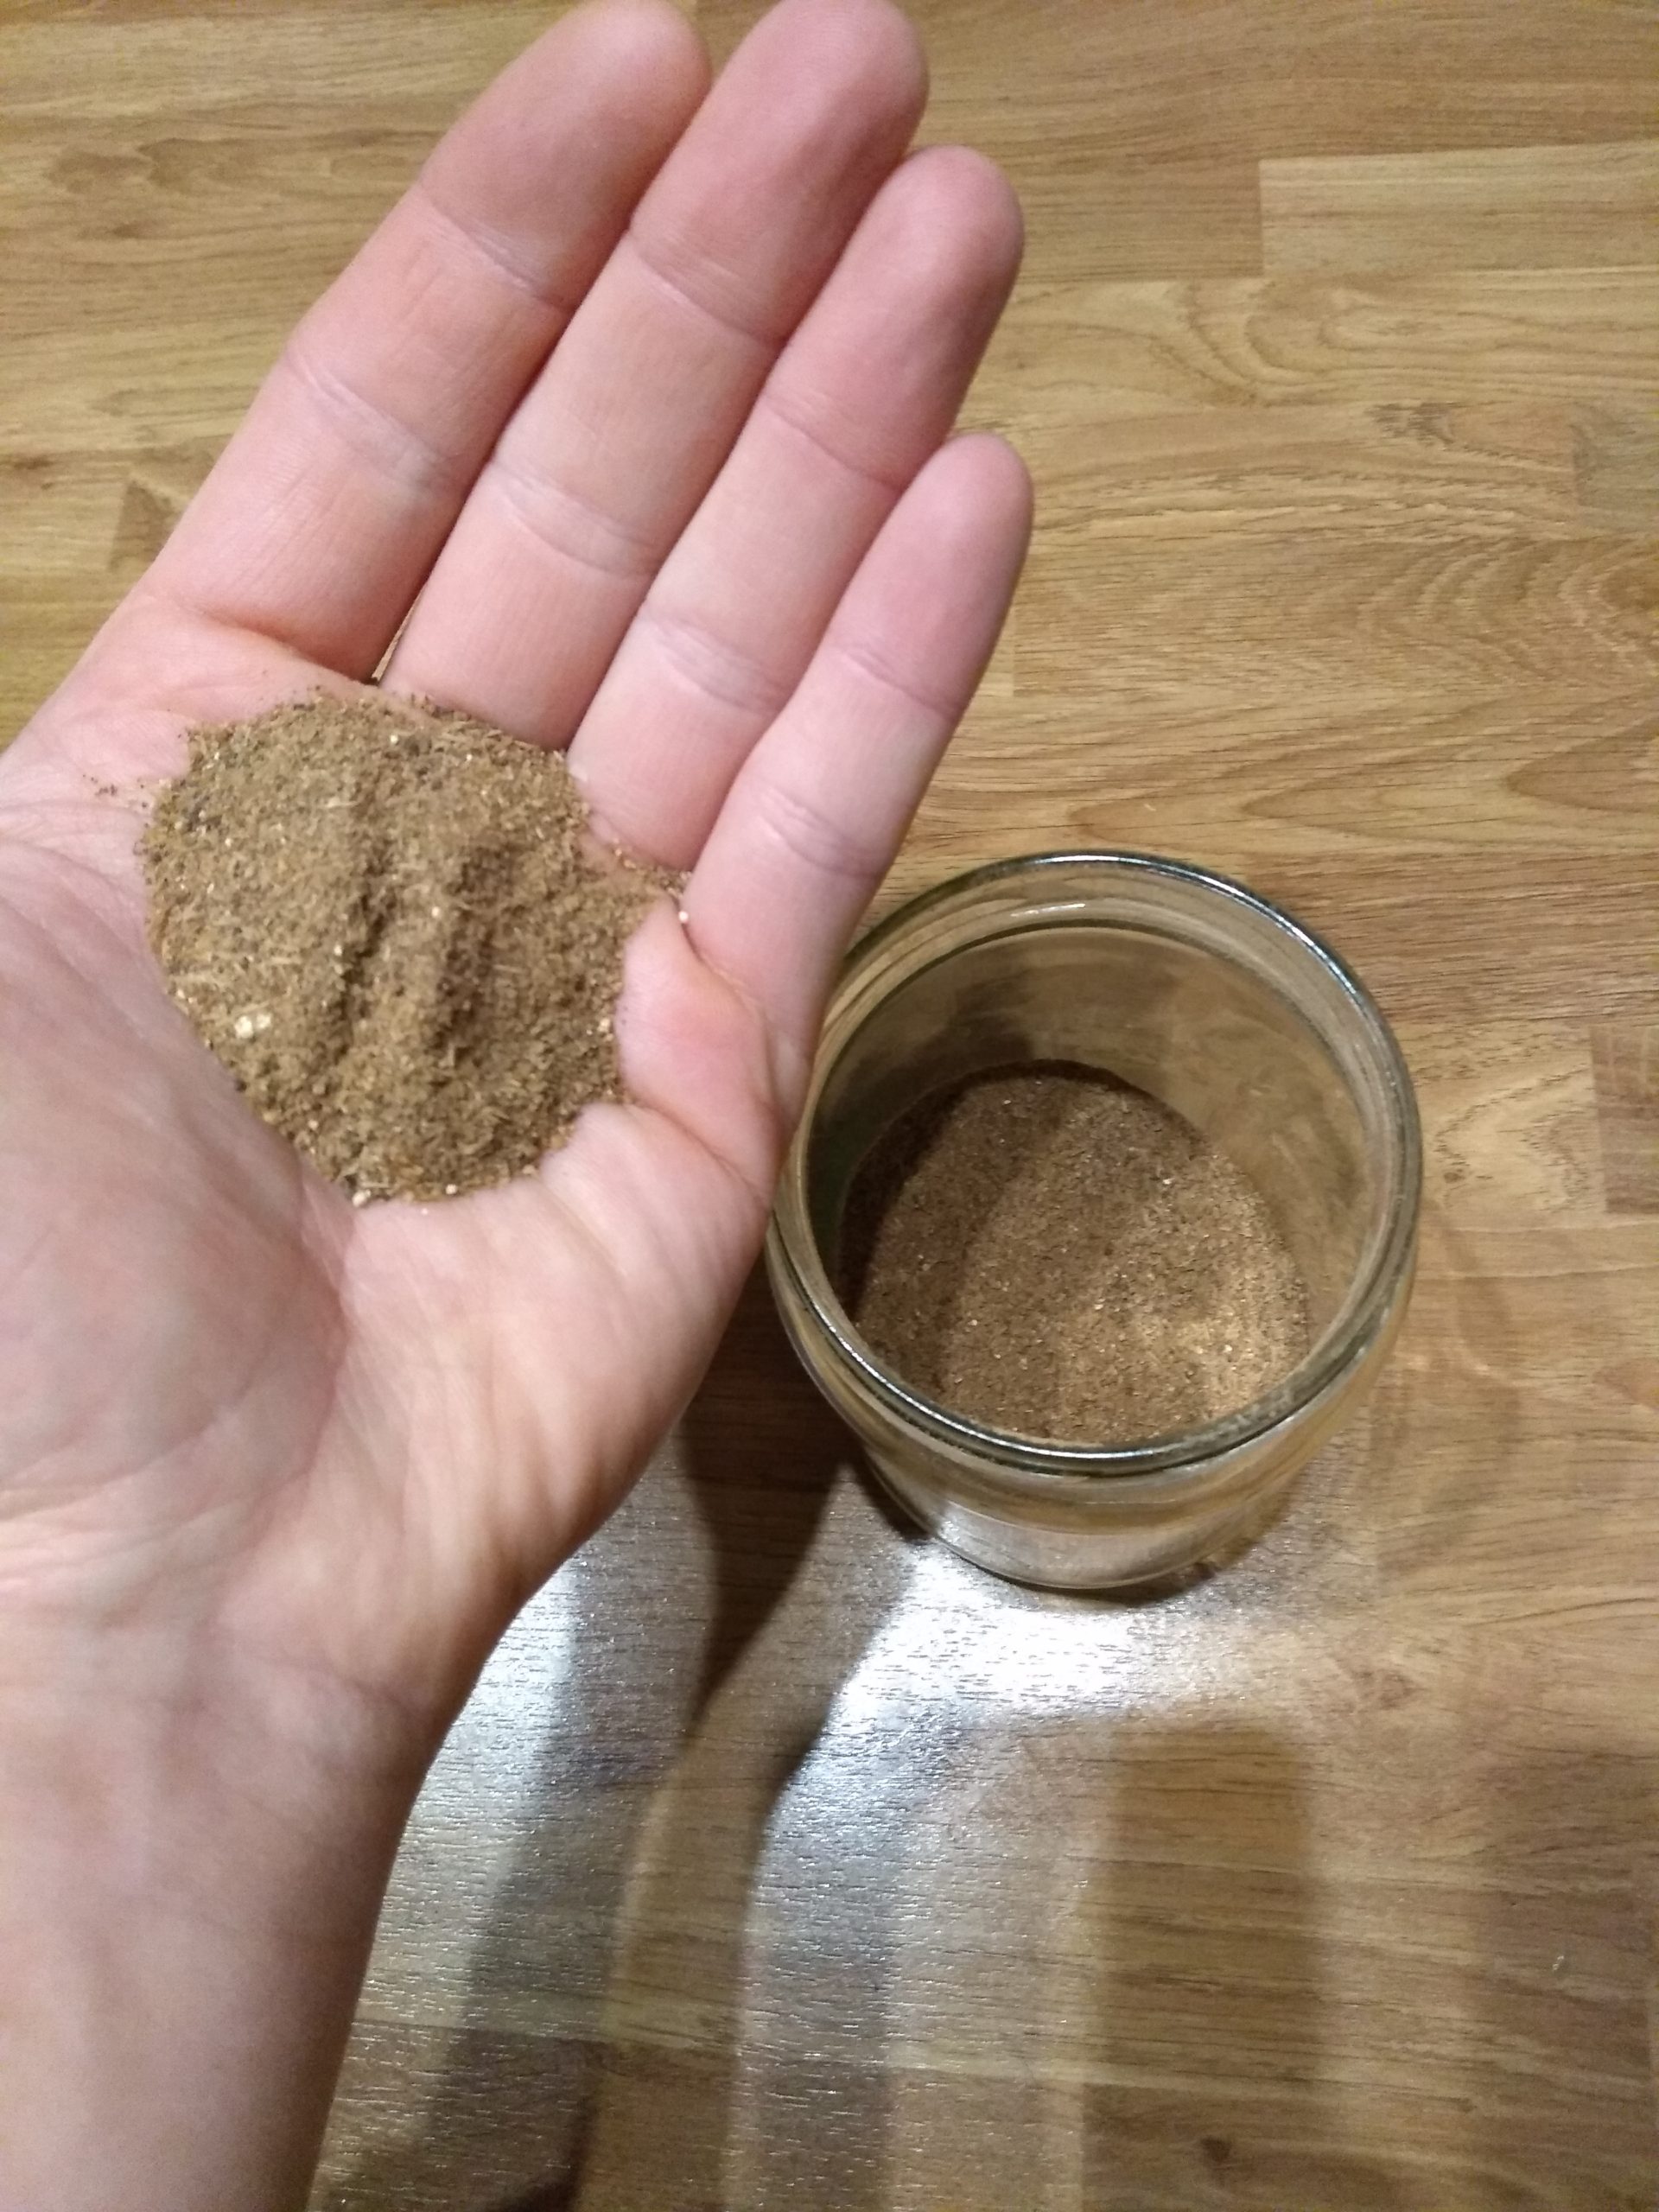
2. Line the inside of the pan with the mesh brewing bag. Use a spoon or other utensil for this… The water is hot!

3. Add all of the grain from the bag labelled ‘GRIST’, stirring as you do to avoid the grains clumping together.

4. When the grain is mixed take a second to enjoy the smell… This is your mash.

5. Start a countdown timer for 60 mins.
6. The temperature inside the pan will drop a little when the grain is added. The goal is to keep the temperature between 65 and 67 degrees Celsius. Your brewing bag may not be suitable for direct heating. So, if the temperature drops below 65 degrees, add SMALL amounts of boiling water, from a kettle, and stir until you’re back on track. If the temperature raises too much, simply add some cold water. Don’t worry about diluting the beer too much and don’t worry too much if it goes high or low for a few minutes, it’s not a bomb, it’s beer!


7. Around 60 mins after you added the grain, CAREFULLY pinch together the mouth of the bag or pull the drawstring. Remove the bag and grain from the pan SLOWLY. The bag will be hot… Hold the grain bag over the pan to allow the wort to drain. You don’t have to get it all, but the more the better. You just made wort.

Used grain can be composted, reserved for use in baking or can simply be thrown away.

Grain will retain around 1 L of liquid. There’s unfortunately nothing you can do about that. But don’t worry, we’ve designed the recipe with this in mind.

No Gear Method (Mash and Sparge)

1. Heat 4L of water to around 70 degrees Celsius. Don’t fill the pan to the brim as you will need some room to add your ingredients.

2. Add all of the grain from the bag labelled ‘GRIST’, stirring as you do to avoid the grains clumping together. This grain-water mixture is now your mash.

3. The temperature inside the pan will drop a little when the grain is added. Try to keep the temperature between 65 and 67 degrees Celsius. If the temperature drops too low simply turn on the heat. If you over-shoot then a small amount of cold water can be added. Bear in mind that this is brewing and not brain surgery, you don’t need to be perfect!

4. Start a countdown timer for 60 mins.

5. After around 30 mins. In a separate pan, heat a further 3 L of water to 80 degrees Celsius. This water is your sparge water.

6. After 45 mins, gently raise the temperature of the rest of the mash to 80 degrees Celsius. Keep the temperature at 80 degrees until the countdown timer has finished.

7. Around 60 mins after you added the grain, using a sieve, filter the mash to separate the grain and the wort.

8. Using your sparge water, rinse the grain.

Step 2: The Boil

After the mash, you must boil your beer. Your beer will be boiled for 60 minutes. This serves a few purposes, but mainly, the boiling process helps to release all that delicious bitterness locked in the hops provided in your Brwit Recipe Kit. Boiling beer is the same, no matter what equipment you have.

Each packet of hops contains a precisely weighed amount of hops. These are labelled with information on the variety and amount of hops each contains for your information. This label also has important information about when to add each packet. Note that the time listed on the packet refers to the time remaining. For example, a packet labelled as 60 mins is added at the START of the boil, not the end.
 

Your pan lid shouldn’t be used during the boil stage. It’s normal for your wort to reduce in volume.

The longer hops are boiled, the more bitterness is extracted. This is accounted for when your recipe was designed.

1. Raise the temperature of the remaining wort to a boil. At this point you’ll see a skin appear on the top. This is called hot break and it will dissipate.

2. When the wort is boiling vigorously (a rolling boil) add the small bag labelled ‘HOP ADDITION 1’.

3. Start a countdown timer for 60 minutes.

4. Feel free to keep an eye on the boil, making sure that it remains vigorous without boiling over, but your work is done here until the next hop addition.

5. As the boil continues, add each packet of hops according to the time listed on the packet.

6. With 10 minutes remaining, consider sanitising a wooden spoon, thermometer and sieve using whichever sanitiser you find best.

7. With 2 minutes remaining, using the sanitised wooden spoon and sieve, remove as much of the hop material as possible. This is optional at this stage but it will drastically improve the quality of your beer. 

8. If your kit contains hops listed as 1 min or 0 mins, these can be added now. These must also be removed before the beer is transferred to the fermenter.

9. When the countdown timer finishes, remove the pan from the heat. Now allow your beer to cool to 25 degrees Celsius as quickly as possible. This can be done by simply allowing to cool naturally or, for faster results, an ice bath can be used.

Step 3: Ferment

Fermentation is where all the action takes place! It’s the point in the brewing process where you hand the reigns over to your army of yeast to turn that delicious, hard-earned wort into beer! Whilst fermentation may be a largely hands-off process, it is extremely important to do the correct prep-work. Namely: make sure that everything that comes into contact with your beer from now on is sanitised and make sure that your beer is properly cooled to at least 25 degrees Celsius before adding the yeast. Some recipes contain ‘dry hops’. These are added directly into the fermentor. Pay close attention to the hop packets for when to add these hops.
 
 
  1. Sanitise the fermentor, fermentor lid, air lock and your thermometer. If planning to use a sieve, sanitise this also.
  2. When the wort has cooled to below 25 degrees Celsius the liquid can be transferred into the fermentor. Transferring is best done by decanting the liquid the pre-sanitised sieve, leaving as much of the hop and solid material (‘trub’) behind as possible. Whilst trub does not negatively affect your beer, it does take up fermentor space. If large amounts of hop material are transferred into the fermentor, this will change the character of the beer.
  3. If using a wide-knecked fermentor such as those available in the Brwit equipment kits then the liquid can be directly decanted easily. If using a standard narrow-knecked fermentor then a sanitised funnel can be used as an aid. Alternatively, a length of tubing may be used to siphon the liquid into the fermentor.
  4. Once the liquid is in the fermentor, add enough cold water to bring the level of the liquid up to the 4.5 L mark. 
  5. If using a hydrometer to monitor fermentation, a small sample can now be removed to measure the original gravity (OG) of the wort using your hydrometer. See our ‘using a hydrometer guide’ for instructions on how to do this (not essential).
  6. Sprinkle the yeast into the fermentor and stir well. The liquid will now be cloudy but will clear over time.
  7. Place the airlock into the hole and put a small amount of water into the airlock.
  8. Place the fermentor somewhere cool, ideally between 16 and 20 degrees Celsius.
  9. You should see (and hear) bubbles pass through the fermentor within 24 hours. The bubbling should last a few days. When the bubbles stop, wait 24-48 hours and move on to bottling*!

*Some recipes require dry hops to be added at this point. If you are making one of these recipes, do not bottle at this stage. Instead, add the dry hops and wait a further 3 days before removing the dry hops and bottling.

Dry-hopping is the technique of adding hops directly into the fermentor. This adds intense hop aroma and flavour to the beer. Dry hopping is done at varying times, depending on the style of beer. Some add dry hops early (24 hours or so into fermentation) and some styles require the dry hops to be added late (after fermentation is finished). In either case, for the best results, dry hops should only be in contact with beer for 3 days. This can sometimes mean removing the hops with a sieve during fermentation if adding dry hops early.


Step 4: Bottling

A few days after your fermentation stops bubbling, it’s time to bottle your beer! Whilst this step is the quickest and easiest, there are a lot of ‘moving parts’ during bottling so please read this guide to the end before starting your bottling day. During this (final) step, we transfer the finished beer into bottles and also add a small amount of sugar to each bottle. This is known as ‘priming sugar’ and is responsible for carbonation. Too little and your beer may not carbonate, too much and your beer may well redecorate your kitchen, so take care when adding priming sugar.

Each kit makes approximately 12-13 x 330ml bottles or 8-9 x 500ml bottles however ANY bottle of any size can be used to store beer in as long as it can be sealed. 


If you can’t source glass bottles or don’t want to invest in a capper, fizzy drink bottles work just as well.

When filling bottles try to avoid disturbing the yeast sitting at the bottom of your fermenter. This won’t harm you or the beer if it is transferred but will affect the aesthetic of your beer

  1. Clean and sanitize all equipment that will come into contact with your beer including bottles, caps, sieve, spoons and any tubing.
  2. If your beer recipe used ‘dry hops’ remove these using a sieve or slotted spoon. This is best done in advance of bottling to avoid disturbing the yeast cake at the bottom of the fermenter.
  3. To each bottle add 5g or 1 flat teaspoon of priming sugar to each bottle. This is independent of the size of the bottle you are using. 5g or 1 flat teaspoon is the maximum amount of sugar per bottle.*add a note box here*
  4. If you are using a BRWIT fermentor or another brand with a tap, slowly fill your bottles dispensing from the tap on the fermentor. Do not fill bottles to the brim, leave a little head space.
  5. If your fermentation vessel does not have a tap, transfer your beer using either a sanitized jug/funnel or siphon the liquid using a length of sanitized tubing.
  6. Once the liquid is transferred, quickly seal the bottles such that they are air tight.
  7. Invert the bottles several times to allow the priming sugar to mix with the liquid, don’t worry if this doesn’t entirely dissolve, it will dissolve completely over time.
  8. Store the bottles upright at room temperature for 1-2 weeks, until fully carbonated.

CRAFT A NEW BEER EVERY MONTH WITH BRWIT MEMBERSHIP

Posted on Leave a comment

SIXSTRIPEGUIDE

SIX STRIPE HAZY PALE ALE

STYLE

In 2004, deep in the heart of Vermont, a pair of brewers decided to challenge the entire identity of the IPA. Long had the IPA been a stiff, bitter drink that had become so popular it was becoming a little boring. These innovative brewers distilled everything that was people loved about the IPA: tropical, juicy hop flavours, a full body and a fluffy white head and an ABV to make your beer drinking experience last. In doing so, they thew caution – and clarity – to the wind. They removed the harsh bitterness that they saw as getting out of hand. They realised that American beer didn’t need American yeast. They broke centuries of tradition and redefined what ‘dry hopping’. These experiments in flavour and aroma quickly caught on with brewers all over New England (and soon the world) taking on the challenge of rethinking the IPA. In 2004, the hazy ‘New England IPA’ was born. And it’s here to stay.

SIX STRIPE Hazy IPA is our homage to those brewers that saw the need for a new beer in the new century. It pays tribute to the six stripes of New England on the American flag that made this great beer invention possible. Here we blend old traditions with new, using more American hops than we have ever used in a beer before. Adding our blend of Chinook, Cascade and Simcoe hops early into fermentation allows for all of the tropical, citrus and pine flavours to be properly extracted by our favourite English ale yeast to ensure for a juicy, tropical and hazy pour. During the brewing process we have dialled back the bitterness and adding lashings of creamy oats to our biggest ever malt bill to create a creamy, soft, ‘pillowy’ mouth feel.

ABV
0 %
IBU
0

GRAINS

  • Pale Malt

    Pale Malt is malted barley that is kilned just enough to preserve the natural sugars and enzymes within the grain. As such, pale malt makes a fantastic base to any beer as it provides an extremely efficient source of sugar and nutrition for yeast to convert to alcohol. At Brwit, we use a slightly darker kilned pale malt in order to impart a more robust, malty sweetness and fuller body. More colour = more flavour.

  • Rolled Oats

    Rolled Oats are a powerful addition to any brewer’s toolbox. As an unmalted adjunct they carry a large amount of undigested protein that aids head retention and improves the body of finished beer. They are also a natural source of essential trace minerals required by yeast. The flavour impact of oats is subtle (and perhaps obvious) but sits well in almost any style with toasty cereal notes. Inclusion of oats at a high level can impact on clarity and may negatively affect mash viscosity during brewing.

  • Crystal Malt

    Pale Crystal Malt is different from other malts in that most of the sugar content in the grain is readily available before the mash. This gives crystal malt a distinctly sweet flavour even when eaten on its own, uncooked. No surprise then that adding a pale crystal malt will add an extremely sweet malty character that persists into the finished beer. Pale crystal also adds notes of syrup and light honey.

  • Munich Malt

    Munich Malt has its origins in Germany where brewers would kiln the barley to a slightly higher temperature to obtain a slightly darker colour and a much richer malt flavour. Used in conjunction with other malts, Munich malt imparts a rich bready flavour to beer and greatly enhances the malt backbone without adding too much residual sweetness.

HOPS

  • Chinook

    Chinook (AA 12-14%) has been around since 1985. The hop was purpose bred for American tastes, using both British and American parent hops. Chinook has a more subdued that other American hops of the 80s but can still impart a subtle grapefruit and pine character when added later in the boil. The real power of Chinook lies in its powerful bittering character. Adding even small amounts of Chinook can create a very bitter beer. This work-horse hop has seen a recent resurgence due to its very high oil and myrcene content. This makes Chinook a very good choice for modern dry-hopping techniques to impart a pleasing, resinous hop mouth-feel.

  • Simcoe

    Simcoe (AA 12-14%) is the definition of an instant classic. Released in the year 2000 by YCH in Washington, Simcoe has quickly found its way into the tool belt of every craft brewer due to its versatility and extremely sought after flavour profile. Added early in the boil, Simcoe will add a strong and rounded bitterness to a beer. Added later in the brewing process, Simcoe will impart strong and sharp tropical and citrus fruit flavours with a resinous mouth feel. Adding Simcoe to the fermenter as a dry hop will add a pleasing floral seasoning with a subtle, delicious passion fruit aroma. In short: Simcoe makes any IPA or pale ale perfect.

  • Cascade

    Cascade (AA 5-7%) Is the quintessential American hop! The hop was originally bred in the 1970s by growers that took both ends of the British hop spectrum: the spicy, earthy Goldings end, and the intense fruity, floral Fuggles end of the spectrum. The result is a hop that harmoniously toes the line between tropical and floral with intense grapefruit character. Added early in the boil, cascade can produce a good bitterness. However, adding within the last 20 minutes of the boil turns any beer into a true tropical, fruity craft classic. Adding Cascade as a dry hop creates a resinous, grapefruit character that almost every American brewery has sought after for almost half a century.

Posted on Leave a comment

Sanitation Guide

The first free rules of making beer are: 1) Sanitation, 2) Sanitation and 3) Sanitation. As boring as it sounds, without proper sanitation, a batch of hard-earned beer can go bad very quickly. So it is very important that everything that comes into contact with your beer after it has been boiled is clean and sanitary. Cleaning is easy, some household detergent, water and a little elbow grease will do the trick. Not to mention, you can usually tell by eye when something is clean (is there any dirt left on it?). Sanitation is a little trickier. When sanitising or sterilising something you are trying to kill all, or at least 99.9% of bacteria and other organisms on the surface. If enough of these microbes make it into your beer they can compete with the yeast for food and, rather than making alcohol, the bad organisms might make something that doesn’t taste that good, and isn’t as fun as alcohol.

Luckily, there are a few tried and tested ways to ensure that your equipment is properly sterilised before bottling or fermenting your beer, and there are a few products that have taken almost all of the guess-work out of the process. I’ll go over some of my preferred methods, starting with the most readily available options. THe table below is a quick reference for you to see the pros and cons of the various methods I’m about to discuss:

Sanitiser Pros Cons
Pasteurising
Basically Free Doesn’t clean
Handy and easy to do Not suitable for all surfaces/materials
No rinsing required Long contact time
Household Bleach
Easy to find Requires heavy rinsing
Very cheap A little complicated to use properly
Cleans and sanitises Concentrate can damage clothing and skin
Long contact time
Oxygen-based cleaners
Cleans and sanitises Requires a lot of rinsing
Powder is easy to store and clean up Weighing powder can be difficult
Does not produce bubbles Fairly long contact time
Relatively cheap and available
Campden Tablets
Readily available Does not clean
Does not sanitise completely
Rinsing required
Very long contact time required
Star San (acid-based)
Cleans and sanitises Somewhat specialist and not readily available
No rinsing required
Short contact time
Non-harmful
Can be reused
Can be stored and sprayed
Easy to prepare
Iodophor
Works extremely well Heavy rinsing required
Does not clean
Relatively expensive

1. Pasteurising: This is basically a fancy way of saying sterilising using boiling water or steam. This method works very well and I will often use it to sanitise my thermometer, spoon and sieve before transferring beer into my fermentor. To do this I simply add these items to my wort during the last 10 minutes of the boil and cover the pan with a lid. 10 minute contact time is enough to assume that the equipment is sterile. Not everything can be pasteurised though, some plastic equipment and glass cannot be sterilised using hot water as they will either melt or crack. For these items, a softer approach is required.


2. Household Bleach (chlorine-based cleaners): Yes, common household bleach makes a great sanitiser for your brewing equipment. It is very important when using bleach that you read the instructions carefully and take care to remove all traces of is after you are finished. The bleach bottle should give you appropriate dilution factors (e.g. 1 part bleach to 20 parts water) that will be different with each brand. They may also give an appropriate contact time for sterilisation. This means the amount of time that it takes for the bleach to kill all of the bacteria. PAY ATTENTION TO ALL OF THESE INSTRUCTIONS and do not be tempted to ‘do more’.

The difficulty with bleach comes with rinsing. Most household products will have a bleach component and a surfactant component which will make bubbles if sloshed about too much. These can be difficult to remove but THEY MUST BE REMOVED as, not only do they impact flavour, but they can also be harmful. After you have all of the bubbles out, be sure to keep rinsing until the smell of bleach is completely gone. Again, this can be harmful but more than anything, will impact flavour and may actually kill some of your precious yeast.

FULL DISCLOSURE: there is a method out there to increase the efficacy of bleach and speed-up the clean up process by diluting and then adding vinegar. I will not go into this here as it is very easy to mess up which can be immediately dangerous to your health because it generates chlorine. I have a PhD in chemistry and I still do not use this method as it is easy to get wrong at home. But, in the interests of being fully transparent, I have included a link to an article on it here.


3. VPW and other Oxygen-based cleaners: VPW is a brand of oxygen-based sanitiser that seems like it has been around since beer itself. Like bleach, these cleaners will also clean and sanitise your equipment but they will do so without generating lots of bubbles. This makes clean-up much easier. Much like bleach, however, they do come with a certain smell that, whilst not unpleasant in any way, must be rinsed out before you can trust your equipment to be ready to use.

These cleaners generally come in a powder form and must be dissolved in water before use. Again, be sure to follow the instructions on the container to the letter. This can be slightly more difficult when using a powder as you may have to weigh-out very small quantities of material. A good thing though, is that a little goes a very long way and it is very cheap to begin with.


4. Campden Tablets (metabisulfite sanitation): Those who are accustomed to making wine will know all about campden tablets. Campden tablets are used to kill-off any yeast that remain in solution at the end of wine making so that your wine doesn’t end up too-dry or even carbonated. It may seem obvious then that these can be used to sanitise equipment. Unfortunately it is not quite that simple. Campden will kill wild yeasts and SOME bacteria but not all of it. Furthermore, campden tablets are not very good for cleaning equipment and so if you are intending to sterilise using campden, be sure to clean your equipment first.


5. Star San HB and other no-rinse Sanitisers: It cleans, it sterilises, it even rinses itself! No, I don’t have shares in this company, it’s just the sanitiser that I use the most. Other no-rinse sanitisers are available, but Star San is my go-to so I’ll use that as my major example. Star San is a liquid, phosphoric acid based sanitiser that comes in a bottle that has a cool self-measuring segment. This means that you can accurately dilute it without needing any other equipment. Above all else, this is a no-rinse sanitiser with a low contact time. This means that any bubbles that are generated and any residue that is left on the surface is non-harmful to people, yeast or beer. This means that Star San can even be used as a spray that can be used to cover a large surface area very quickly which can be used (without rinsing) 90 seconds later.

The biggest down-side to Star San is the cost. It is a little more expensive initially than other sanitisers however, the per-use cost is very very low. Once diluted, Star San can be stored and kept for a very long time AND not only that, but can also be reused. This brings me to the second downside: if you buy a bottle of Star San, you’d better have a good place to put it, as you’ll have it for a very long time!


6. Iodophor (and other iodine-based sanitisers): These things kill EVERYTHING! If you have are brewing in a place that has mould, fungus or naturally occurring yeasts (and you can’t move somewhere else) then iodophor is the sanitiser for you. Unlike other sanitisers, this will kill an extremely broad range of microbes.

If you’ve ever seen a hospital drama, iodophor is the brown stuff that they paint on people before surgery. Whilst this is a pretty good endorsement of it’s sterilising power, you will probably have noticed that it has an extremely strong colour! Therefore, iodophor requires HEAVY rinsing after use. In fact, if there’s any iodophor left, it will almost definitely stop your fermentation from taking place as, like I said, it kills EVERYTHING including brewers yeast. Also, if you thought that Star San was expensive, iodophor probably isn’t the product for you.


And that is our list of Sanitisers! Sanitation isn’t cool but it is extremely important!


Happy Brewing,


Jim

Posted on 2 Comments

How to Prep. Spent Grain for Baking (spent grain flour)

At the end of a brew day you’re left with three things: 1) delicious soon-to-be beer, 2) a little washing up to do and 3) spent grain. If you’ve ever reached into the brew bag or seive at the end of the day and tasted a little bit of spent grain you’ll know as much as I do that it still has quite a lot of flavour locked in there! That’s why I decided a long time ago that my spent grain was no longer destined for the compost heap and that I was instead going to investigate how to turn my malty sweet spent grain into delicious treats!

At this point, I’ve used spent grain for all sorts of things. From cookies to the crock pot and from cereal to steak rubs there’s nowhere that I won’t try to squeeze a little maltiness into. In order to take full advantage of your spent grain in all these facets some processing may be required. The grain can be used straight as it comes out of the mash tun. We’ll call this wet grain. This goes great in cookies and bread and basically anything that is made from a dough. Wet grain brings with it a little moisture and so a dough is the perfect way to use it. If does, however, tend to get a little smelly after a few days so be sure to store wet grain in an air-tight container such as a zip-lock bag in the fridge. If you would like to store your spent grain for a little while, or use it in a recipe where moisture is not ideal, then follow the instructions below on how to make spent grain flour!

  1. Set your oven to the lowest temperature possible (around 50 degrees C).
  2. Line a suitably sized baking tray with parchment. Not essential but it prevents the grain burning to the bottom of the tray.
  3. Tip the spent grain onto the parchment and spread out into a thin layer. The layer should be no more than an inch thick. Any more is fine but the grain will take much longer to dry.
  4. Place the tray in the oven overnight. This will produce quite a lot of moisture. If you like (or if you’re trying to dry a lot of grain) you can stir this periodically, ensuring to turn the grain over, exposing the wet grain to the surface.
  5. After around 8 hours (overnight-ish) give the grain a final stir. Consider mixing the grain with your fingers to assess the water content. Alternatively, you could simply take a piece of paper towel and rub this through the grain. If you deem the grain to even slightly wet at this point then it must go back into the oven until completely dried.
  6. If this process it taking a very long time, consider removing some of the grain. The time it takes to dry the grain increases dramatically as more grain is added.
  7. Transfer your, now dry, grain into a zip-lock bag or other container. This can now be kept in a cupboard basically forever! Adding this to cookies, cereal, bread, pastry etc. as-is to provide a little malty crunchiness.
  8. If you would like to make flour out of the grain then simply transfer some into a blender or electronic coffee grinder. If you’re a braver person than me, you could even use a mortar and pestle! If using an electronic blending method be sure to stop blending and stir every so often. Grains generally contain some fatty content. As this is blended, it can cause the flour to become sticky which then forms clumps.
  9. Now simply transfer your freshly-milled flour into an air-tight container. Again, this can be stored indefinitely or can be used straight away in bread, to make a delicious malty meat rub or to thicken a soup. The possibilities are endless!!!

Happy cooking!

Jim

Posted on Leave a comment

CASKMASTERGUIDE

CASK MASTER EXTRA SPECIAL BITTER

STYLE

The style of Bitter started life in the very same breweries as the pale ales in 18th century Britain. However, pale ale grew up on the road and so was served bottled, the style of bitter grew up in pubs and was exclusively sold on cask. As innocent as a serving suggestion may seem, this lead to a splitting of the family tree. Barrel-ageing and very late dry hopping lead to variations in colour, sweetness and, above all, hop aroma. In short: bitter wasn’t made for the cask. It was made IN the cask.

Cask Master ESB is an ‘Extra Special Bitter’ meaning slightly more alcohol and much more hop aroma than is seen in standard bitters. In designing this recipe we had 3 things in mind: a deep copper body, a creamy white head and a toasty, nutty malt backbone that fills every moreish mouthful. Our inclusion of low levels of brown malt and late dry hopping will have your beer tasting like it was drawn straight from the cellar.

ABV
0 %
IBU
0

GRAINS

  • Maris Otter

    Maris Otter is a cultivar of barley typically kilned to a mid-pale degree. Maris Otter was the result of a selective breeding process in England in the 1960s and since then has dominated as a must-have malt choice in the grist of any English style. Using Maris Otter as the base of your beer expect a red-copper hue with nutty and malty tastes.

  • Munich Malt

    Munich Malt has its origins in Germany where brewers would kiln the barley to a slightly higher temperature to obtain a slightly darker colour and a much richer malt flavour. Used in conjunction with other malts, Munich malt imparts a rich bready flavour to beer and greatly enhances the malt backbone without adding too much residual sweetness.

  • Pale Crystal Malt

    Pale Crystal Malt is different from other malts in that most of the sugar content in the grain is readily available before the mash. This gives crystal malt a distinctly sweet flavour even when eaten on its own, uncooked. No surprise then that adding a pale crystal malt will add an extremely sweet malty character that persists into the finished beer. Pale crystal also adds notes of syrup and light honey.

  • Brown Malt

    Brown Malt is an ancient malt as far as grist choices go. This was traditionally used in high proportions in early porter and brown beers. Brown malt gets its colour from being kilned and roasted over a coal fire. This imparts a subtle and pleasing smoked flavour. The colour imparted by this malt perhaps goes without saying but it can be included in paler beers at lower proportions to avoid getting a brown beer. The overriding flavours given by this malt at low levels are coffee and chocolate.

  • Rolled Oats

    Rolled Oats are a powerful addition to any brewer’s toolbox. As an unmalted adjunct they carry a large amount of undigested protein that aids head retention and improves the body of finished beer. They are also a natural source of essential trace minerals required by yeast. The flavour impact of oats is subtle (and perhaps obvious) but sits well in almost any style with toasty cereal notes. Inclusion of oats at a high level can impact on clarity and may negatively affect mash viscosity during brewing.

HOPS

  • Northern Brewer

    Northern Brewer (AA 6-10%) originates from the UK and so it well suited to English and European-style ales and lagers. There are also some classic styles in the US (such as California Common) that rely on Northern Brewer hops. It is a truly versatile hop. Added early in the boil Northern Brewer will provide a highly bitter base and perhaps a woody taste with little hop aroma. Added later, this hop provides a pleasant piney flavour and aroma with slight minty notes.

  • East Kent Golding

    East Kent Golding (AA 5-6%) is the ultimate English hop and has been used by almost every British brewery for centuries. Though the bittering power of EKG aren’t great, adding early in the boil lays down a base of strong honey. Adding as a flavour addition opens up a world of flavours that can range from earthy to floral lavender and thyme.

Posted on Leave a comment

HIGHSEASGUIDE

HIGH SEAS ENGLISH IPA

STYLE

The story of the style of IPA has everything a good origin story needs: genius craftsmen, warring nations and of course, tax levies. In the 1700s all of these factors combined, as brewers sought new markets to sell their products in that were like no place a beer had ever travelled before. The high heat and humidity of trans-equitorial travel and south-asian serving rooms meant that brewers had to protect their beer in the form of large amounts of anti-microbial hops and very high attenuation to drive the sugar content down, thus starving any opportunistic microbes before they could take hold. The intention, was a beer that would survive the high seas. The result, was the perfect sunny weather drink: pale, crisp and delightfully bitter.

High Seas IPA is an English IPA in the truest sense, modelled after the original beers that sailed across the globe almost 300 years ago. Pouring this beer you will see a clear, deep golden beverage with a fluffy white head. Get closer and the dry hops provide a burst of lavender and citrus. Dive-in and you will find a malt character that belies its pale complexion. Traditional English varieties subtly bolstered by the extra-malty Munich malt. This, of course, sits nicely atop the all important 48 IBUs providing a beautifully bitter after-taste.

Approx ABV
0 %
IBU
0

GRAINS

  • Maris Otter

    Maris Otter is a cultivar of barley typically kilned to a mid-pale degree. Maris Otter was the result of a selective breeding process in England in the 1960s and since then has dominated as a must-have malt choice in the grist of any English style. Using Maris Otter as the base of your beer expect a red-copper hue with nutty and malty tastes.

  • Pale Ale Malt

    Pale Ale Malt is a lightly kilned two-row barley malt developed during the industrial revolution in England when alternate kiln fuels were developed. Pale ale malt has high diastatic power and contains a high amount of carbohydrates. This malt alone gives a very pale yellow-golden colour with a light, uncomplicated malty taste.

  • Pale Crystal Malt

    Pale Crystal Malt is different from other malts in that most of the sugar content in the grain is readily available before the mash. This gives crystal malt a distinctly sweet flavour even when eaten on its own, uncooked. No surprise then that adding a pale crystal malt will add an extremely sweet malty character that persists into the finished beer. Pale crystal also adds notes of syrup and light honey.

  • Munich Malt

    Munich Malt has its origins in Germany where brewers would kiln the barley to a slightly higher temperature to obtain a slightly darker colour and a much richer malt flavour. Used in conjunction with other malts, Munich malt imparts a rich bready flavour to beer and greatly enhances the malt backbone without adding too much residual sweetness.

  • Rolled Oats

    Rolled Oats are a powerful addition to any brewer’s toolbox. As an unmalted adjunct they carry a large amount of undigested protein that aids head retention and improves the body of finished beer. They are also a natural source of essential trace minerals required by yeast. The flavour impact of oats is subtle (and perhaps obvious) but sits well in almost any style with toasty cereal notes. Inclusion of oats at a high level can impact on clarity and may negatively affect mash viscosity during brewing.

HOPS

  • Northern Brewer

    Northern Brewer (AA 6-10%) originates from the UK and so it well suited to English and European-style ales and lagers. There are also some classic styles in the US (such as California Common) that rely on Northern Brewer hops. It is a truly versatile hop. Added early in the boil Northern Brewer will provide a highly bitter base and perhaps a woody taste with little hop aroma. Added later, this hop provides a pleasant piney flavour and aroma with slight minty notes.

  • Fuggles

    Fuggles (AA 4-6%) is a hop so treasured by English brewers that it has travelled the world to lend it’s unmistakable flavour profile to future generations of ‘craft’ hops. Fuggles is not typically used to impart bitterness, however, when added early in the boil it can impart a clean, gentle spiciness. The true power of this hop lies within 20-30 minute boils where fresh-cut grass, fruity and floral flavours dominate. Adding as a dry hop provides an aroma that holds its own against any other hop in the world.

Posted on Leave a comment

Making Beer Without Equipment

It’s nice to have lots of cool, shiny equipment to make beer with but, let’s be honest, it can take a bit of time to accrue exactly the right inventory of toys in your brewing cupboard. So if you’re a beginner, or something decides to break or wander off, it might seem like you have to put-off brew day until you have all your ducks in a row.

Never fear! When we started making beer at home we had nothing but a wooden spoon and saucepan and so over the years there has been a lot of experimentation and improvisation. We’re here in this article to show you how you can use stuff that you might already own, as a quick substitute for a fancy gadget gathering dust on your amazon wish list! Along the way we’ll also discuss where we think that your money is best-placed in the beginning.

Mashing

Mashing seems like a lot of hassle because its the very first step in the brew day. Not only that but you’re also dealing with solids AND liquids AND temperatures AND timings. Never fear, even if it seems like you need to remember hundreds of things, you definitely don’t need to spend hundreds of pounds!

  • Measuring Jug: One of the first jobs on brew day is to measure out an appropriate amount of water. If you find yourself without a measuring jug, a good alternative is to use a kitchen weighing scale. Each litre of water weighs exactly 1 kg and so if you need to measure out 5 L of water for a mash-method brew, simply weigh out 5 kg of tap water. If you don’t have a scale or weighing liquids is difficult, then bear in mind that pint glasses (I know you have some of those lying around) hold around 570 ml (⅔ = 380, half = 285, third = 190). This means that 8 pints and 1 ⅔ of a pint get you right up to your 5 L of water.
  • Weighing Ingredients: If you weren’t lucky enough to have us weigh your ingredients out for you then obviously, a kitchen scale is the obvious choice here. If you don’t have a kitchen scale then this is a good place to invest a little money, even a very cheap scale will pay for itself very quickly and can be used outside of the brewery. A digital scale is most useful. If your scale is broken then I suggest simply buying bags of grain in amounts similar to those that you are going to need them in and throw them all in. For example, if your pale ale requires 900 g of pale ale malt and 200 g of crystal, simply buy 1 kg of pale ale and 250 g of crystal. It won’t be perfect but it will definitely still make beer! Hops are a little more difficult, as most vendors (Brwit excluded) will not weigh out hops for you. If you absolutely have to eyeball pre-packaged hops then I suggest buying pelletised hops. They aren’t as pretty to look at and, in my opinion, don’t give as tasty results, but they are more uniform in shape and size than hop flowers.
  • Saucepans: Most people will have a reasonably sized saucepan for making, well… Sauce. The trick is having enough space in the saucepan, not only for the liquid, but all the grain also. If you don’t have access to a pan that can hold at least 2 L more than the volume of liquid you need then you can mash in ANY container that is rated as ‘food safe’. So if you have a bowl or plastic box that is big enough, go right ahead. Temperature can be maintained by adding cold or boiling water to lower or raise the temperature respectively. Obviously, you WILL need a pan to boil in so it may be worth investing in a larger pan.
  • Thermometer: This is my top pick for places to spend your money early on. A glass thermometer might cost £2 and is worth Every. Single. Penny. A thermometer is necessary for maintaining mash temperature and determining when your beer is cool enough to pitch yeast into. THERE IS A WAY TO MASH without a thermometer, a method known as decoction mashing. Decoction mashing is a method that is way beyond the scope of this quick-hitter but it basically involved adding your grist to cold water and periodically removing portions of it. These portions are boiled and then returned to the main mash which slightly raises the overall temperature. This process is repeated until the mash is at or around the correct temperature… Simple enough right?… I am a much bigger fan of thermometers than I am of decoction mashing.
  • Filter: As nice as porridge is, beer is way better. So after the mash you have to remove all that grain material from the sweet liquid wort. A standard kitchen sieve will achieve this nicely. If the sieve doesn’t quite do the job then recirculating the wort through the sieve and grain will definitely get any rogue pieces of cereal out. IF YOU WANTED TO SPLASH OUT here then I highly recommend getting some sort of mesh bag to brew with (usually referred to as a BrewBag). This removes the need to keep lugging large amounts of hot water around and, especially on the small scale, they’re usually pretty damn efficient! Still though, that old kitchen sieve sat at the back of the kitchen cupboard will do the trick nicely.

Boiling

Boiling requires much less finesse (and equipment) than mashing. I do have a kit suggestions right off the bat, though: a clock. Any kind of clock. Ideally a stopwatch or timer but to execute the perfect boil, all you really need is to keep an eye on the time! All the rest is just gravy!

  • Fining agent: If you’re a fan of clear beer, it can seem like a good idea to try to encourage some of the particulate material (trub) that gets left in the pan to drop out of solution a little bit. This is usually achieved using a fining agent called ‘irish moss’ (or ‘protofloc’ or ‘whirlfloc’ etc). If you don’t have any of these things to hand, a small amount of gelatin can be added (somewhere in the region of a half teaspoon per gallon). This is best added whilst the beer is hot so that it has the best chance of dissolving. A BETTER ALTERNATIVE to this is something that is finding its way into kitchens more and more these days. A product called ‘xantham gum’ that is used as a gluten-free, vegan thickener. Xanthan gum is a VERY GOOD thickener and so you really only need around a quarter of a teaspoon per gallon. If you’re weighing, you need much less than 1 g of powder. Again, add this whilst the beer is hot so that it dissolves properly.
    AN ALTERNATIVE TO FINING is to not fine at all. Studies have shown that, not only does kettle trub NOT have a negative effect but that it might actually have a POSITIVE effect on fermentation and yeast health… I’m still unsure what to make of that but if it means I can be a little lazy at the end of a brewday I might be inclined to give it some thought from time to time.
  • Hydrometer: If you want to know how strong your beer is or monitor the progress of your brewing or fermentation then you may want to measure the gravity of your beer. A hydrometer is the perfect way to do this. HOWEVER, if you don’t have one of those there are alternatives. The best alternative, I think, is the good old kitchen scale. To get a gravity reading using your scales then simply measure out a known volume of liquid using a measuing jug or glass (for example 100 ml). Then weigh this liquid IN GRAMS (remember not to include the weight of the glass or jug in the measurement). Divide the scale weight by the volume of liquid and there you have your gravity.FOR EXAMPLE! If I’m making a porter with a target original gravity of 1.050 and have somehow broken ANOTHER hydrometer at the end of a brew day I will accurately measure-out 100 ml of my cold wort. I will then weigh this. Lets say the weight of 100 ml of this liquid is 105.00 g. I’ll then divide 105.00 g by 100 ml to get my gravity of 1.050. Again, if the most accurate way that you have of measuring liquid is with a pint glass then use that and divide by 568 ml instead of 100 ml. I will just say though that, whilst beer gravity is nice to know, it is not essential, especially in the early days.

Fermentation

Fermentation is the final step of the actual brewing process and, while it might seem like you just have to leave your beer in a dark room for a week, there is still some equipment required.

  • Sanitiser: Sanitation, sanitation, sanitiation. The three golden rules of brewing! Sanitation is boring. There’s no denying that. It is however, super important. This is where I will make a purchase recommendation. There is a no-rinse sanitiser brand called StarSan. A bottle of StarSan will cost around £16, depending on where you buy it and how much postage costs, and could last the rest of your natural life. Not only is it no-rinse but it is odorless, reusable, storable, cleans as well as sanitises and only requires a 90 second contact time which means that it can also be applied by spraying… That being said, this article isn’t called ‘Some Equipment Brewing’ so I’ll crack on with my no-purchase necessary options.
    Household bleach can be used to sanitise equipment. Be sure to make the bleach up to the correct dilution as stated on the back of the bottle as different brands of bleach contain varying concentrations of bleach. Sanitising with bleach is more difficult than sanitising with a no-rinse sanitiser but it does have a handy indicator for when your stuff is clean: if it smells like bleach, keep on rinsing! Most equipment can also be pasteurised i.e. sanitised using boiling water (or wort). If you really dont want to use StarSan or bleach then you can boil your equipment. This works well for spoons, hydrometers, thermometers, sieves etc. but can be a little more difficult for fermentors. Glass fermentors can NOT be pasteurised using boiling water (because they explode) and most plastic ones can’t either (because they implode).
  • Transferring: This is an overlooked part of the brewday. The final hurdle, when almost 5 L of liquid is moved from a large, open-topped pan, into a small fermentor. My advice here is that a funnel or piece of tubing does the trick wonderfully! Simply filter-off the hop material and then siphon the liquid or pour through the funnel. Failing that, using a wide-necked fermentor also removes a lot of the difficulty from this. HOWEVER if you’re trying to be frugal and can’t find any of that stuff then I have a trick for you.
    The Wooden Spoon Technique as I am just now referring to it, will get your beer from A to B with minimal spills. DISCLAIMER, It might require some practice… and a friend. Take a sanitised wooden spoon and turn it upside down. Place the end of the spoon handle through the neck of the fermentor with the other end in the air. Touch the lip of your cold pan to the base of the spoon handle. Now pour. Pour with conviction and the liquid will run down the edge of the spoon, into the fermentor. Simple. Like I said, you may need a friend to help you hold either the spoon or the pan… The pan will be heavier so chose your role wisely!
  • Fermentor: If fermentation is simply leaving your beer in a dark room for a week then you’re going to need a container to put it in. This can be literally ANYTHING that fits 5 L of liquid in. Some recommendations here are a wide-neck (to make transfer easier), a smooth lining (to make cleaning and sanitising easier) and one that has a marking at 4.5 L. I do not recommend an insulated container as the beer will get warm during fermentation and it is important for this heat to be able to be dissipated. A 5 L water bottle is perfect.
  • Bubbler/Airlock: Finally, your beer is in the fermentor, now you just need a way to keep the bugs out without an explosion. A great way to do this is with the tried and tested balloon technique. Putting a small hole in an ordinary balloon and putting over the neck of the fermentor allows the carbon dioxide generated from the fermentation to be released as it is formed. The positive pressure of carbon dioxide leaving the balloon will prevent any backteria from entering the container. This technique also has the advantage of letting you know when fermentation is active (the balloon inflates) and when it is over (the balloon looks sad). If a balloon is a little over budget OR you listened to us back in the transferring step and the neck of your fermentor is too wide then an ‘open’ fermentation is the way forward. Simply place a piece of sanitised foil or tissue paper over the mouth of the fermentor and secure with an elastic band. An open fermentation can also give some interesting flavour profiles to a beer so it may be worth trying this even if you have a bubbler handy?

There it is! The Brwit guide to brewing without spending a penny on equipment. If you think that we have missed anything off the list or would like more advice on how to implement some of the tips, please get in touch! We love to hear from you.

The Brwit Team

Posted on Leave a comment

How to Use a Hydrometer

The question on almost everyone’s lips when they first try a home-brewed beer is: How strong is it? When I first started to brew beer at home, this seemed like an irrelevant question, I was just happy to have made something drinkable. However, I now see that knowing the alcohol content of a beer that you have brewed is actually a really useful tool. Afterall, each recipe is designed with an alcohol content in mind. If the ABV ends up go above or below this, the beer can become unbalanced or, at the very least, not quite the beer it was supposed to be. So, how do we measure this magic number?

What is a hydrometer?

The alcohol content of beer can be calculated using a hydrometer. A hydrometer is a very simple, retro-looking piece of scientific equipment that almost every homebrewer needs. Whether you’re interested in knowing the alcohol content of your brews or not, a hydrometer can still let you know how the brew day went and how the fermentation is going as it progresses.

What do they measure?

Hydrometers do not actually measure alcohol content. This means that you cannot simply drop a hydrometer into finished beer and get a reading. Hydrometers actually measure the density or specific gravity (aka ‘gravity’) of a liquid. In beer, the density is affected by the amount of sugar contained in the solution, the more sugar you extract from your all-grain mash, the higher the density (aka original gravity – gravity at the start of fermentation). This is a useful, as every recipe is formulated to give an exact original gravity. Knowing the original gravity therefore lets you know if you brewed the beer correctly.

During fermentation, the sugar concentration drops as it is converted to alcohol. Therefore, knowing the original gravity and the current or final gravity of the beer lets you know how much sugar has been converted to alcohol, and therefore, allows you to calculate how much alcohol you have in your beer! Monitoring the gravity during fermentation is a great way to monitor the progress. If the gravity continues to drop, then the beer is still fermenting. If the scale stays the same for several days then it is pretty safe to assume that your beer is ready for the bottle.

How do I use a hydrometer?

Each hydrometer is calibrated against pure water and sugar solutions. They each have a scale of specific gravity units on them that will typically (for a brewing hydrometer) range from 0.980 right up to 1.250. To measure the gravity of the liquid simply:

  1. Ensure the liquid has cooled to room temperature.
  2. Draw some of the liquid into a tall sample jar. 
  3. Drop the hydrometer into the liquid. 
  4. Gently spin the hydrometer.
  5. Move your eye-line down to the level of the hydrometer (don’t lift the hydrometer to your eye-line).
  6. The liquid at the top of the trial jar will have a curve to the surface known as a meniscus. The reading of the hydrometer is taken from the bottom of the meniscus, not the top 
  7. Whatever the number at the bottom of the meniscus is, that is the density of the liquid.

To measure the alcohol content of your beer simply do this process immediately after brewing, prior to pitching yeast. This is your OG (original gravity). Then, continue to repeat this process during fermentation. When the gravity remains constant, the beer is finished. The gravity at this point is known as the FG (final gravity). To convert these numbers into an ABV simply use the following equation:

ABV = (OG – FG) X 131.25

EXAMPLE, OG = 1.050, FG = 1.008

ABV = (1.050 – 1.008) X 131.25 = 5.5 %

Now you know! Whether you want to measure the alcohol of your beer of simply know when it’s done, a hydrometer can help you to achieve this and now you have all the tools you need to measure up!

Happy Brewing,

Jim

Posted on Leave a comment

MILLRUNNERGUIDE

MILL RUNNER ENGLISH PALE ALE

STYLE

Pale ales have their roots in the industrial revolution in Britain. Gentler roasting techniques and new types of smokeless fuel meant that for the first time, drinkers were given a choice as to what they wanted their beer to LOOK like, as well as taste like. Using more subtly flavoured malts not only allowed brewers to fine tune the malt backbone of their beers, but also to really open-up an area that may have been somewhat cloudy before: hop flavour.

Approx ABV
0 %
IBU
0

GRAINS

  • Maris Otter

    Maris Otter is a cultivar of barley typically kilned to a mid-pale degree. Maris Otter was the result of a selective breeding process in England in the 1960s and since then has dominated as a must-have malt choice in the grist of any English style. Using Maris Otter as the base of your beer expect a red-copper hue with nutty and malty tastes.

  • Pale Ale Malt

    Pale Ale Malt is a lightly kilned two-row barley malt developed during the industrial revolution in England when alternate kiln fuels were developed. Pale ale malt has high diastatic power and contains a high amount of carbohydrates. This malt alone gives a very pale yellow-golden colour with a light, uncomplicated malty taste.

  • Pale Crystal Malt

    Pale Crystal Malt is different from other malts in that most of the sugar content in the grain is readily available before the mash. This gives crystal malt a distinctly sweet flavour even when eaten on its own, uncooked. No surprise then that adding a pale crystal malt will add an extremely sweet malty character that persists into the finished beer. Pale crystal also adds notes of syrup and light honey.

  • Munich Malt

    Munich Malt has its origins in Germany where brewers would kiln the barley to a slightly higher temperature to obtain a slightly darker colour and a much richer malt flavour. Used in conjunction with other malts, Munich malt imparts a rich bready flavour to beer and greatly enhances the malt backbone without adding too much residual sweetness.

  • Rolled Oats

    Rolled Oats are a powerful addition to any brewer’s toolbox. As an unmalted adjunct they carry a large amount of undigested protein that aids head retention and improves the body of finished beer. They are also a natural source of essential trace minerals required by yeast. The flavour impact of oats is subtle (and perhaps obvious) but sits well in almost any style with toasty cereal notes. Inclusion of oats at a high level can impact on clarity and may negatively affect mash viscosity during brewing.

HOPS

  • East Kent Goldings

    East Kent Golding (AA 5-6%) is the ultimate English hop and has been used by almost every British brewery for centuries. Though the bittering power of EKG aren’t great, adding early in the boil lays down a base of strong honey. Adding as a flavour addition opens up a world of flavours that can range from earthy to floral lavender and thyme.

Posted on Leave a comment

1721GUIDE

1721 LONDON PORTER

STYLE

Porter, as a style, originated in London in the 1700s. The original encarnacions served as a way of delivering a source of nutrition to the working classes of the day. Porter very quickly became every brewery’s passion project. For the first time, breweries had a way to take control out of the hands of the pub landlord, selling a product that did not require cellaring or ageing in the drinking house. Porter was, instead, aged at the brewery. It didn’t take long for porter to leave London and travel across Britain and even overseas. As so many breweries over the years have put their own spin on porter, there isn’t really an example that sums up the style. What did come out of all of the dark arts experimentation, however, were two subcategories: ‘Brown Porter’ and ‘Robust Porter’.

1721 Porter is a brown porter. At its heart is the malt that lead to the porter revolution all those years ago: brown malt. Expect a sweet chocolate flavour up-front chased by a delicate smokey taste. The hop character of this beer is uncomplicated, providing an appropriate level of bitterness and just enough of a floral nose to cleanse your palate.

ABV
0 %
IBU
0

GRAINS

  • Maris Otter

    Maris Otter is a cultivar of barley typically kilned to a mid-pale degree. Maris Otter was the result of a selective breeding process in England in the 1960s and since then has dominated as a must-have malt choice in the grist of any English style. Using Maris Otter as the base of your beer expect a red-copper hue with nutty and malty tastes.

  • Pale Crystal Malt

    Pale Crystal Malt is different from other malts in that most of the sugar content in the grain is readily available before the mash. This gives crystal malt a distinctly sweet flavour even when eaten on its own, uncooked. No surprise then that adding a pale crystal malt will add an extremely sweet malty character that persists into the finished beer. Pale crystal also adds notes of syrup and light honey.

  • Brown Malt

    Brown Malt is an ancient malt as far as grist choices go. This was traditionally used in high proportions in early porter and brown beers. Brown malt gets its colour from being kilned and roasted over a coal fire. This imparts a subtle and pleasing smoked flavour. The colour imparted by this malt perhaps goes without saying but it can be included in paler beers at lower proportions to avoid getting a brown beer. The overriding flavours given by this malt at low levels are coffee and chocolate.

  • Chocolate Malt

    Chocolate Malt is a deeply coloured malt that does not contribute much sweetness to the beer. It imparts a deep brown/black colour even at low levels. The flavours bestowed by this grain can be considered chocolatey, however the chocolate descriptor refers more to the colour of the malt than its flavour. Expect strong coffee and roast flavour even bordering on pleasantly acidic.

HOPS

  • Northern Brewer

    Northern Brewer (AA 6-10%) originates from the UK and so it well suited to English and European-style ales and lagers. There are also some classic styles in the US that rely on Northern Brewer hops. It is a truly versatile hop. Added early in the boil Northern Brewer will provide a highly bitter base and perhaps a woody taste with little hop aroma. Added later, this hop provides a pleasant piney flavour and aroma with slight minty notes.

  • Fuggles

    Fuggles (AA 4-6%) is a hop so treasured by English brewers that it has travelled the world to lend it’s unmistakable flavour profile to future generations of ‘craft’ hops. Fuggles is not typically used to impart bitterness, however, when added early in the boil it can impart a clean, gentle spiciness. The true power of this hop lies within 20-30 minute boils where fresh-cut grass, fruity and floral flavours dominate. Adding as a dry hop provides an aroma that holds its own against any other hop in the world.